During the Christmas season, a lot needs to be done. Along with decorating and baking, gifts need to be bought and given. But what about what happens in between? Presents come in all different shapes and sizes, and some are more difficult to wrap than others. Here is how to tackle those tricky objects.
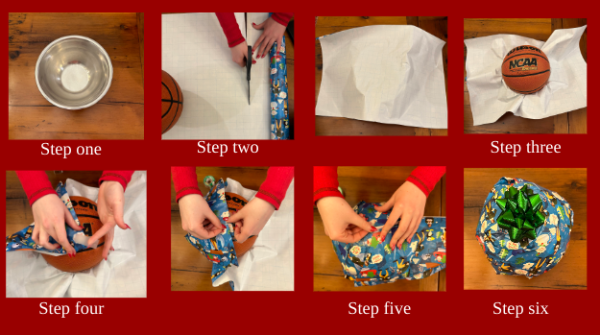
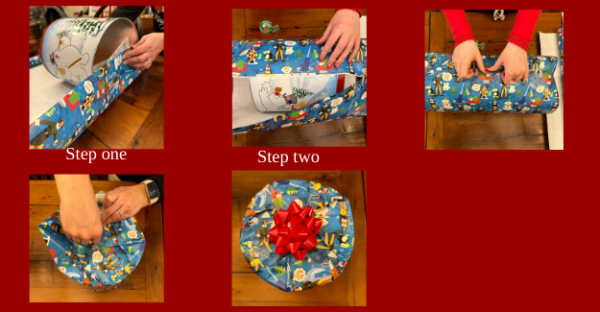
A sphere:
Step one: Get a bowl slightly bigger than the sphere of choice.
Step two: Cut a rectangle of wrapping paper about three times the length of the object and lay it on top of the bowl, placing the design side facing down.
Step three: Put the ball in the bowl on top of the wrapping paper.
Step four: Begin to pull up each corner of the wrapping paper, folding around in a circle rather than randomly folding it in. Keep folding inwards until every side of the paper is meeting at a centerpoint at the top of the sphere.
Step five: Tape over any pieces of paper that stick out.
Step six: Put a festive bow on top of the gift.
A guitar
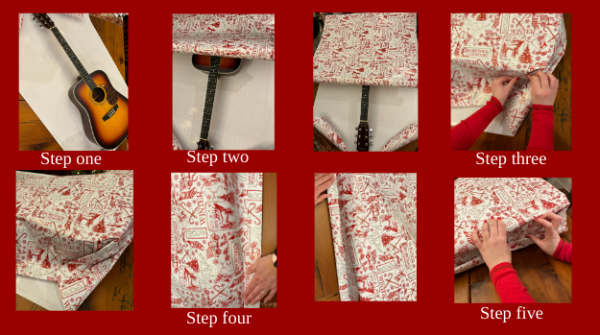
Tip: When wrapping larger objects with defined edges, it’s never a bad idea to use a thicker, more heavy duty wrapping paper.
Step one: Roll out the wrapping paper the length of the guitar and place the guitar on top.
Step two: Roll out the wrapping paper again, covering the front of the guitar completely.
Step three: Fold in the paper at the end of the body of the guitar, flattening it against the body.
Step four: Begin to fold in the excess paper on either side of the guitar, making the folds wider closer to the neck
Step five: Once the folds are hitting the guitar, tape them to it. Make sure you do this on both sides.
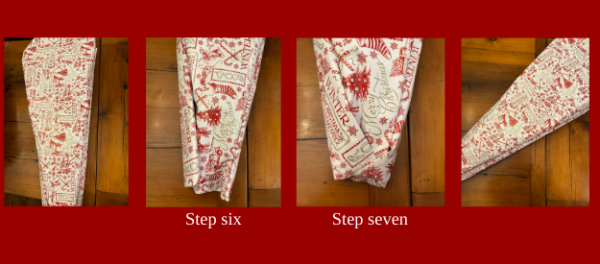
Step six: At the top of the guitar, fold in either side of the two folds made earlier and tape them to meet each other.
Step seven: Roll up the open part at the top of the guitar (if any) and seal it with tape.
A cylinder
Step one: Lay down the cylinder on the wrapping paper, making sure the excess paper at the top and bottom will cover at least half of either side, then cut the paper.
Step two: Roll up the cylinder in the paper and tape either end together.
Step three: Fold in the paper on the seam and go around the top, folding the paper inward to meet in the middle. Repeat on the other side.
Step four: Place a bow on the more neatly wrapped side of the gift.
An Octagon
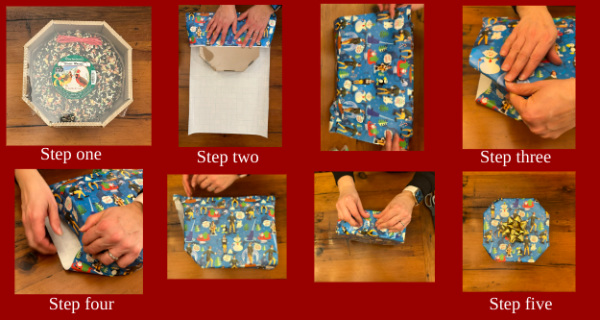
Step one: Cut a rectangle slightly wider than the object
Step two: Fold the long side of the rectangle over either half of the octagon and tape them down.
Step three: On the open side of the wrapping, fold in the side of the wrapping paper, flatten it against the gift and fold in all of the paper that sticks out.
Step four: Repeat three more times, once in each remaining corner.
Step five: Once all of the loose ends of the wrapping paper are taped down, place a bow on top of the side of the gift where there are no seams.
A Vase
Tip: Since vases usually fluctuate in width from top to bottom, they cannot be wrapped like a regular cylinder.
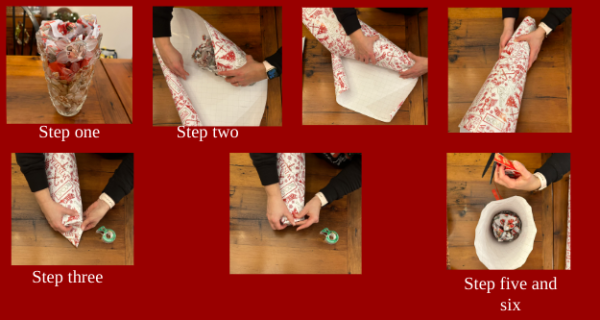
Step one: Fill the vase with tissue paper. It is less likely to shatter if it’s not completely hollow.
Step two: Wrap the vase from the corner of the wrapping paper, not rolling straight horizontal or vertical, but diagonally.
Step three: After completely rolling the vase up, fold in the base of the vase, creating a triangle.
Step four: Flatten the triangle against the base of the vase and tape it down.
Step five: Stand up the vase. The wrapping paper should be coming over the top of the vase unevenly, so cut around in a circle to make it even.
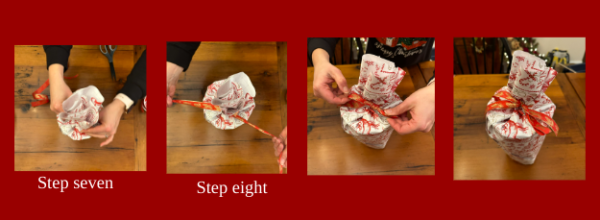
Step six: Cut a generous piece of ribbon
Step seven: Gather the remaining wrapping paper at the top of the present and cinch it together.
Step eight: Wrap the ribbon around the cinched paper and tie a bow.
In the end, it’s not about how the wrapping looks, but the gift inside and the care that counts. If the gift is still too difficult to wrap even after this guide, it’s never a bad idea to put it in a gift bag. Happy wrapping!


